 Vue3项目实战
# Vue3项目
技术栈:
- Vue3
- TypeScript
- vue-router
- pinia
- element-plus
- axios
- echarts
# Vue3组件通信方式
通信仓库地址:https://gitee.com/jch1011/vue3_communication.git
不管是vue2还是vue3,组件通信方式很重要,不管是项目还是面试都是经常用到的知识点。
Vue2组件通信方式:
- props:可以实现父子组件、子父组件、甚至兄弟组件通信
- 自定义事件:可以实现子父组件通信
- 全局事件总线$bus:可以实现任意组件通信
- **pubsub:**发布订阅模式实现任意组件通信
- vuex:集中式状态管理容器,实现任意组件通信
- ref:父组件获取子组件实例VC,获取子组件的响应式数据以及方法
- **slot:**插槽(默认插槽、具名插槽、作用域插槽)实现父子组件通信........
# props
props可以实现父子组件通信,在vue3中我们可以通过defineProps获取父组件传递的数据。且在组件内部不需要引入defineProps方法可以直接使用!
父组件给子组件传递数据
<Child info="abc" :money="money"></Child>
子组件获取父组件传递数据:方式1
let props = defineProps({
  info:{
   type:String,//接受的数据类型
   default:'默认参数',//接受默认数据
  },
  money:{
   type:Number,
   default:0
}})
2
3
4
5
6
7
8
9
子组件获取父组件传递数据:方式2
let props = defineProps(["info",'money']);
子组件获取到props数据就可以在模板中使用了,但是切记props是只读的(只能读取,不能修改)
完整代码
Parent.vue
<template>
  <div class="box">
    <h1>props:我是父组件</h1>
    <hr />
    <Child info="我是父组件" :money="money"></Child>
  </div>
</template>

<script setup lang="ts">
//props:可以实现父子组件通信,props数据还是只读的!!!
import Child from "./Child.vue";
import { ref } from "vue";
let money = ref(10000);
</script>
2
3
4
5
6
7
8
9
10
11
12
13
14
Child.vue
<template>
  <div class="son">
       <h1>我是子组件:曹植</h1>
       <p>{{props.info}}</p>
       <p>{{props.money}}</p>
      <!--props可以省略前面的名字--->
       <p>{{info}}</p>
       <p>{{money}}</p>
       <button @click="updateProps">修改props数据</button>
  </div>
</template>

<script setup lang="ts">
//需要使用到defineProps方法去接受父组件传递过来的数据
//defineProps是Vue3提供方法,不需要引入直接使用
let props = defineProps(['info','money']); //数组|对象写法都可以
//按钮点击的回调
const updateProps = ()=>{
  // props.money+=10;  props:只读的
  console.log(props.info)
}
</script>
2
3
4
5
6
7
8
9
10
11
12
13
14
15
16
17
18
19
20
21
22
# 自定义事件
在vue框架中事件分为两种:一种是原生的DOM事件,另外一种自定义事件。
原生DOM事件可以让用户与网页进行交互,比如click、dbclick、change、mouseenter、mouseleave....
自定义事件可以实现子组件给父组件传递数据
# 原生DOM事件
 <pre @click="handler">
      我是祖国的老花骨朵
 </pre>
2
3
当前代码级给pre标签绑定原生DOM事件点击事件,默认会给事件回调注入event事件对象。当然点击事件想注入多个参数可以按照下图操作。但是切记注入的事件对象务必叫做$event.
<div @click="handler1(1,2,3,$event)">我要传递多个参数</div>
在vue3框架click、dbclick、change(这类原生DOM事件),不管是在标签、自定义标签上(组件标签)都是原生DOM事件。
# 自定义事件
自定义事件可以实现子组件给父组件传递数据.在项目中是比较常用的。
比如在父组件内部给子组件(Event2)绑定一个自定义事件
<Event2 @xxx="handler3"></Event2>
在Event2子组件内部触发这个自定义事件
<template>
  <div>
    <h1>我是子组件2</h1>
    <button @click="handler">点击我触发xxx自定义事件</button>
  </div>
</template>

<script setup lang="ts">
let $emit = defineEmits(["xxx"]);
const handler = () => {
  $emit("xxx", "法拉利", "茅台");
};
</script>
2
3
4
5
6
7
8
9
10
11
12
13
我们会发现在script标签内部,使用了defineEmits方法,此方法是vue3提供的方法,不需要引入直接使用。defineEmits方法执行,传递一个数组,数组元素即为将来组件需要触发的自定义事件类型,此方执行会返回一个$emit方法用于触发自定义事件。
当点击按钮的时候,事件回调内部调用$emit方法去触发自定义事件,第一个参数为触发事件类型,第二个、三个、N个参数即为传递给父组件的数据。
需要注意的是:代码如下
<Event2 @xxx="handler3" @click="handler"></Event2>
正常说组件标签书写@click应该为原生DOM事件,但是如果子组件内部通过defineEmits定义就变为自定义事件了
let $emit = defineEmits(["xxx",'click']);
完整代码:
parent.vue
<template>
  <div>
    <h1>事件</h1>
    <!-- 原生DOM事件 -->
    <pre @click="handler">
      大江东去浪淘尽,千古分流人物
    </pre>
    <button @click="handler1(1,2,3,$event)">点击我传递多个参数</button>
    <hr>
    <!--
        vue2框架当中:这种写法自定义事件,可以通过.native修饰符变为原生DOM事件
        vue3框架下面写法其实即为原生DOM事件

        vue3:原生的DOM事件不管是放在标签身上、组件标签身上都是原生DOM事件
      -->
    <Event1 @click="handler2"></Event1>
    <hr>
    <!-- 绑定自定义事件xxx:实现子组件给父组件传递数据 -->
    <Event2 @xxx="handler3" @click="handler4"></Event2>
  </div>
</template>

<script setup lang="ts">
//引入子组件
import Event1 from './Event1.vue';
//引入子组件
import Event2 from './Event2.vue';
//事件回调--1
const handler = (event)=>{
    //event即为事件对象
    console.log(event);
}
//事件回调--2
const handler1 = (a,b,c,$event)=>{
   console.log(a,b,c,$event)
}
//事件回调---3
const handler2 = ()=>{
    console.log(123);
}
//事件回调---4
const handler3 = (param1,param2)=>{
    console.log(param1,param2);
}
//事件回调--5
const handler4 = (param1,param2)=>{
     console.log(param1,param2);
}
</script>
2
3
4
5
6
7
8
9
10
11
12
13
14
15
16
17
18
19
20
21
22
23
24
25
26
27
28
29
30
31
32
33
34
35
36
37
38
39
40
41
42
43
44
45
46
47
48
49
Event1.vue
<template>
  <div class="son">
      <p>我是子组件1</p>
      <button>点击我也执行</button>
  </div>
</template>

<script setup lang="ts">
</script>
2
3
4
5
6
7
8
9
Event2.vue
<template>
  <div class="child">
    <p>我是子组件2</p>
    <button @click="handler">点击我触发自定义事件xxx</button>
    <button @click="$emit('click','AK47','J20')">点击我触发自定义事件click</button>
  </div>
</template>

<script setup lang="ts">
//利用defineEmits方法返回函数触发自定义事件
//defineEmits方法不需要引入直接使用
let $emit = defineEmits(['xxx','click']);
//按钮点击回调
const handler = () => {
  //第一个参数:事件类型 第二个|三个|N参数即为注入数据
    $emit('xxx','东风导弹','航母');
};
</script>
2
3
4
5
6
7
8
9
10
11
12
13
14
15
16
17
18
# 全局事件总线
全局事件总线可以实现任意组件通信,在vue2中可以根据VM与VC关系推出全局事件总线。
但是在vue3中没有Vue构造函数,也就没有Vue.prototype.以及组合式API写法没有this,那么在Vue3想实现全局事件的总线功能就有点不现实啦,如果想在Vue3中使用全局事件总线功能
可以使用插件mitt实现。
mitt:官网地址:https://www.npmjs.com/package/mitt
安装
npm install --save mitt
src/bus/index.ts
//引入mitt插件:mitt一个方法,方法执行会返回bus对象
import mitt from 'mitt';
const $bus = mitt();
export default $bus;
2
3
4
完整代码
Parent.vue
<template>
  <div class="box">
    <h1>全局事件总线$bus</h1>
    <hr />
    <div class="container">
      <Child1></Child1>
      <Child2></Child2>
    </div>
  </div>
</template>

<script setup lang="ts">
//引入子组件
import Child1 from "./Child1.vue";
import Child2 from "./Child2.vue";
</script>
2
3
4
5
6
7
8
9
10
11
12
13
14
15
16
Child1.vue
<template>
  <div class="child1">
    <h3>我是子组件1</h3>
  </div>
</template>

<script setup lang="ts">
import $bus from "../../bus";
//组合式API函数
import { onMounted } from "vue";
//组件挂载完毕的时候,当前组件绑定一个事件,接受将来兄弟组件传递的数据
onMounted(() => {
  //第一个参数:即为事件类型  第二个参数:即为事件回调
  $bus.on("car", (car) => {
    console.log(car);
  });
});
</script>
2
3
4
5
6
7
8
9
10
11
12
13
14
15
16
17
18
Child2.vue
<template>
  <div class="child2">
     <h2>我是子组件2</h2>
     <button @click="handler">点击我给兄弟送一台法拉利</button>
  </div>
</template>

<script setup lang="ts">
//引入$bus对象
import $bus from '../../bus';
//点击按钮回调
const handler = ()=>{
  $bus.emit('car',{car:"法拉利"});
}
</script>
2
3
4
5
6
7
8
9
10
11
12
13
14
15
# v-model
v-model指令可是收集表单数据(数据双向绑定),除此之外它也可以实现父子组件数据同步。
而v-model实指利用==props[modelValue]==与自定义事==[update:modelValue]==实现的。
下方代码:相当于给组件Child传递一个props(modelValue)与绑定一个自定义事件update:modelValue
实现父子组件数据同步
<Child v-model="msg"></Child>
在vue3中一个组件可以通过使用多个v-model,让父子组件多个数据同步,下方代码相当于给组件Child传递两个props分别是pageNo与pageSize,以及绑定两个自定义事件update:pageNo与update:pageSize实现父子数据同步
<Child v-model:pageNo="msg" v-model:pageSize="msg1"></Child>
完整代码:
Parent.vue
<template>
  <div>
    <h1>v-model:钱数{{ money }}{{pageNo}}{{pageSize}}</h1>
    <input type="text" v-model="info" />
    <hr />
    <!-- props:父亲给儿子数据 -->
    <!-- <Child :modelValue="money" @update:modelValue="handler"></Child> -->
    <!--
       v-model组件身上使用
       第一:相当有给子组件传递props[modelValue] = 10000
       第二:相当于给子组件绑定自定义事件update:modelValue
     -->
    <Child v-model="money"></Child>
    <hr />
    <Child1 v-model:pageNo="pageNo" v-model:pageSize="pageSize"></Child1>
  </div>
</template>

<script setup lang="ts">
//v-model指令:收集表单数据,数据双向绑定
//v-model也可以实现组件之间的通信,实现父子组件数据同步的业务
//父亲给子组件数据 props
//子组件给父组件数据 自定义事件
//引入子组件
import Child from "./Child.vue";
import Child1 from "./Child1.vue";
import { ref } from "vue";
let info = ref("");
//父组件的数据钱数
let money = ref(10000);
//自定义事件的回调
const handler = (num) => {
  //将来接受子组件传递过来的数据
  money.value = num;
};

//父亲的数据
let pageNo = ref(1);
let pageSize = ref(3);
</script>
2
3
4
5
6
7
8
9
10
11
12
13
14
15
16
17
18
19
20
21
22
23
24
25
26
27
28
29
30
31
32
33
34
35
36
37
38
39
40
Child.vue
<template>
  <div class="child">
    <h3>钱数:{{ modelValue }}</h3>
    <button @click="handler">父子组件数据同步</button>
  </div>
</template>

<script setup lang="ts">
//接受props
let props = defineProps(["modelValue"]);
let $emit = defineEmits(['update:modelValue']);
//子组件内部按钮的点击回调
const handler = ()=>{
   //触发自定义事件
   $emit('update:modelValue',props.modelValue+1000);
}
</script>
2
3
4
5
6
7
8
9
10
11
12
13
14
15
16
17
18
Child1.vue
<template>
  <div class="child2">
    <h1>同时绑定多个v-model</h1>
    <button @click="handler">pageNo{{ pageNo }}</button>
    <button @click="$emit('update:pageSize', pageSize + 4)">
      pageSize{{ pageSize }}
    </button>
  </div>
</template>

<script setup lang="ts">
let props = defineProps(["pageNo", "pageSize"]);
let $emit = defineEmits(["update:pageNo", "update:pageSize"]);
//第一个按钮的事件回调
const handler = () => {
  $emit("update:pageNo", props.pageNo + 3);
};
</script>
2
3
4
5
6
7
8
9
10
11
12
13
14
15
16
17
18
# useAttrs
在Vue3中可以利用useAttrs方法获取组件的属性与事件(包含:原生DOM事件或者自定义事件),此函数功能类似于Vue2框架中$attrs属性与$listeners方法。
比如:在父组件内部使用一个子组件my-button
<my-button type="success" size="small" title='标题' @click="handler"></my-button>
子组件内部可以通过useAttrs方法获取组件属性与事件.因此你也发现了,它类似于props,可以接受父组件传递过来的属性与属性值。需要注意如果defineProps接受了某一个属性,useAttrs方法返回的对象身上就没有相应属性与属性值。
<script setup lang="ts">
import {useAttrs} from 'vue';
let $attrs = useAttrs();
</script>
2
3
4
完整代码
Parent.vue
<template>
  <div>
    <h1>useAttrs</h1>
    <el-button type="primary" size="small" :icon="Edit"></el-button>
    <!-- 自定义组件 -->
    <HintButton type="primary" size="small" :icon="Edit" title="编辑按钮" @click="handler" @xxx="handler"></HintButton>
  </div>
</template>

<script setup lang="ts">
//vue3框架提供一个方法useAttrs方法,它可以获取组件身上的属性与事件!!!
//图标组件
import {
  Check,
  Delete,
  Edit,
  Message,
  Search,
  Star,
} from "@element-plus/icons-vue";
import HintButton from "./HintButton.vue";
//按钮点击的回调
const handler = ()=>{
  alert(12306);
}
</script>
2
3
4
5
6
7
8
9
10
11
12
13
14
15
16
17
18
19
20
21
22
23
24
25
26
HintButton.vue
:="$attrs"相当于 v-bind="$attrs"
<template>
  <div :title="title">
     <el-button :="$attrs"></el-button>
  </div>
</template>

<script setup lang="ts">
//引入useAttrs方法:获取组件标签身上属性与事件
import {useAttrs} from 'vue';
//此方法执行会返回一个对象
let $attrs = useAttrs();

//万一用props接受title
let props =defineProps(['title']);
//props与useAttrs方法都可以获取父组件传递过来的属性与属性值
//但是props接受了useAttrs方法就获取不到了
console.log($attrs);
</script>
2
3
4
5
6
7
8
9
10
11
12
13
14
15
16
17
18

# ref与$parent
ref,提及到ref可能会想到它可以获取元素的DOM或者获取子组件实例的VC。既然可以在父组件内部通过ref获取子组件实例VC,那么子组件内部的方法与响应式数据父组件可以使用的。
比如:在父组件挂载完毕获取组件实例
父组件内部代码:
<template>
  <div>
    <h1>ref与$parent</h1>
    <Son ref="son"></Son>
  </div>
</template>
<script setup lang="ts">
import Son from "./Son.vue";
import { onMounted, ref } from "vue";
const son = ref();
onMounted(() => {
  console.log(son.value);
});
</script>
2
3
4
5
6
7
8
9
10
11
12
13
14
但是需要注意,如果想让父组件获取子组件的数据或者方法需要通过defineExpose对外暴露,因为vue3中组件内部的数据对外“关闭的”,外部不能访问
<script setup lang="ts">
import { ref } from "vue";
//数据
let money = ref(1000);
//方法
const handler = ()=>{
}
defineExpose({
  money,
   handler
})
</script>
2
3
4
5
6
7
8
9
10
11
12
$parent可以获取某一个组件的父组件实例VC,因此可以使用父组件内部的数据与方法。必须子组件内部拥有一个按钮点击时候获取父组件实例,当然父组件的数据与方法需要通过defineExpose方法对外暴露
<button @click="handler($parent)">点击我获取父组件实例</button>
完整代码
Parent.vue
<template>
  <div class="box">
    <h1>我是父亲:{{money}}</h1>
    <button @click="handler">找我的儿子借10元</button>
    <hr>
    <Son ref="son"></Son>
    <hr>
    <Dau></Dau>
  </div>
</template>

<script setup lang="ts">
//ref:可以获取真实的DOM节点,可以获取到子组件实例VC
//$parent:可以在子组件内部获取到父组件的实例
//引入子组件
import Son from './Son.vue'
import Dau from './Daughter.vue'
import {ref} from 'vue';
//父组件钱数
let money = ref(100000000);
//获取子组件的实例
let son = ref();
//父组件内部按钮点击回调
const handler = ()=>{
   money.value+=10;
   //儿子钱数减去10
   son.value.money-=10;
   son.value.fly();
}
//对外暴露
defineExpose({
   money
})
</script>
2
3
4
5
6
7
8
9
10
11
12
13
14
15
16
17
18
19
20
21
22
23
24
25
26
27
28
29
30
31
32
33
34
Son.vue
<template>
  <div class="son">
    <h3>我是子组件:{{money}}</h3>
  </div>
</template>

<script setup lang="ts">
import {ref} from 'vue';
//儿子钱数
let money = ref(666);
const fly = ()=>{
  console.log('我可以飞');
}
//组件内部数据对外关闭的,别人不能访问
//如果想让外部访问需要通过defineExpose方法对外暴露
defineExpose({
  money,
  fly
})
</script>
2
3
4
5
6
7
8
9
10
11
12
13
14
15
16
17
18
19
20
Daughter.vue
<template>
  <div class="dau">
     <h1>我是闺女{{money}}</h1>
     <button @click="handler($parent)">点击我爸爸给我10000元</button>
  </div>
</template>

<script setup lang="ts">
import {ref} from 'vue';
//闺女钱数
let money = ref(999999);
//闺女按钮点击回调
const handler = ($parent)=>{
   money.value+=10000;
   $parent.money-=10000;
}
</script>
2
3
4
5
6
7
8
9
10
11
12
13
14
15
16
17
# provide与inject
provide[提供]
inject[注入]
vue3提供两个方法provide与inject,可以实现隔辈组件传递参数
组件组件提供数据:
provide方法用于提供数据,此方法执需要传递两个参数,分别提供数据的key与提供数据value
<script setup lang="ts">
import {provide} from 'vue'
provide('token','admin_token');
</script>
2
3
4
后代组件可以通过inject方法获取数据,通过key获取存储的数值
<script setup lang="ts">
import {inject} from 'vue'
let token = inject('token');
</script>
2
3
4
完整代码
Parent.vue
<template>
  <div class="box">
    <h1>Provide与Inject{{car}}</h1>
    <hr />
    <Child></Child>
  </div>
</template>

<script setup lang="ts">
import Child from "./Child.vue";
//vue3提供provide(提供)与inject(注入),可以实现隔辈组件传递数据
import { ref, provide } from "vue";
let car = ref("法拉利");
//祖先组件给后代组件提供数据
//两个参数:第一个参数就是提供的数据key
//第二个参数:祖先组件提供数据
provide("TOKEN", car);
</script>
2
3
4
5
6
7
8
9
10
11
12
13
14
15
16
17
18
Child.vue
<template>
  <div class="child">
     <h1>我是子组件1</h1>
     <Child></Child>
  </div>
</template>

<script setup lang="ts">
import Child from './GrandChild.vue';
</script>
2
3
4
5
6
7
8
9
10
GrandChild.vue
<template>
  <div class="child1">
    <h1>孙子组件</h1>
    <p>{{car}}</p>
    <button @click="updateCar">更新数据</button>
  </div>
</template>

<script setup lang="ts">
import {inject} from 'vue';
//注入祖先组件提供数据
//需要参数:即为祖先提供数据的key
let car = inject('TOKEN');
const updateCar = ()=>{
   car.value  = '自行车';
}
</script>
2
3
4
5
6
7
8
9
10
11
12
13
14
15
16
17
# pinia
pinia官网:https://pinia.web3doc.top/
pinia也是集中式管理状态容器,类似于vuex。但是核心概念没有mutation、modules,使用方式参照官网
main.ts
//引入仓库
import store from './store'
app.use(store)
2
3
store/index.ts
//创建大仓库
import { createPinia } from 'pinia';
//createPinia方法可以用于创建大仓库
let store = createPinia();
//对外暴露,安装仓库
export default store;
2
3
4
5
6
store/modules/info.ts 选择器API方式
//定义info小仓库
import { defineStore } from "pinia";
//第一个仓库:小仓库名字  第二个参数:小仓库配置对象
//defineStore方法执行会返回一个函数,函数作用就是让组件可以获取到仓库数据
let useInfoStore = defineStore("info", {
    //存储数据:state
    state: () => {
        return {
            count: 99,
            arr: [1, 2, 3, 4, 5, 6, 7, 8, 9, 10]
        }
    },
    actions: {
        //注意:函数没有context上下文对象
        //没有commit、没有mutations去修改数据
        updateNum(a: number, b: number) {
            this.count += a;
        }
    },
    getters: {
        total() {
            let result:any = this.arr.reduce((prev: number, next: number) => {
                return prev + next;
            }, 0);
            return result;
        }
    }
});
//对外暴露方法
export default useInfoStore;
2
3
4
5
6
7
8
9
10
11
12
13
14
15
16
17
18
19
20
21
22
23
24
25
26
27
28
29
30
store/modules/todo.ts 组合式API方式
//定义组合式API仓库
import { defineStore } from "pinia";
import { ref, computed,watch} from 'vue';
//创建小仓库
let useTodoStore = defineStore('todo', () => {
    let todos = ref([{ id: 1, title: '吃饭' }, { id: 2, title: '睡觉' }, { id: 3, title: '打豆豆' }]);
    let arr = ref([1,2,3,4,5]);

    const total = computed(() => {
        return arr.value.reduce((prev, next) => {
            return prev + next;
        }, 0)
    })
    //务必要返回一个对象:属性与方法可以提供给组件使用
    return {
        todos,
        arr,
        total,
        updateTodo() {
            todos.value.push({ id: 4, title: '组合式API方法' });
        }
    }
});

export default useTodoStore;
2
3
4
5
6
7
8
9
10
11
12
13
14
15
16
17
18
19
20
21
22
23
24
25
完整代码:
Parent.vue
<template>
  <div class="box">
    <h1>pinia</h1>
    <div class="container">
      <Child></Child>
      <Child1></Child1>
    </div>
  </div>
</template>

<script setup lang="ts">
import Child from "./Child.vue";
import Child1 from "./Child1.vue";
//vuex:集中式管理状态容器,可以实现任意组件之间通信!!!
//核心概念:state、mutations、actions、getters、modules

//pinia:集中式管理状态容器,可以实现任意组件之间通信!!!
//核心概念:state、actions、getters
//pinia写法:选择器API、组合式API
</script>
2
3
4
5
6
7
8
9
10
11
12
13
14
15
16
17
18
19
20
Child.vue
<template>
  <div class="child">
    <h1>{{ infoStore.count }}---{{infoStore.total}}</h1>
    <button @click="updateCount">点击我修改仓库数据</button>
  </div>
</template>

<script setup lang="ts">
import useInfoStore from "../../store/modules/info";
//获取小仓库对象
let infoStore = useInfoStore();
console.log(infoStore);
//修改数据方法
const updateCount = () => {
  //仓库调用自身的方法去修改仓库的数据
  infoStore.updateNum(66,77);
};
</script>
2
3
4
5
6
7
8
9
10
11
12
13
14
15
16
17
18
Child1.vue
<template>
  <div class="child1">
    {{ infoStore.count }}
    <p @click="updateTodo">{{ todoStore.arr }}{{todoStore.total}}</p>
  </div>
</template>

<script setup lang="ts">
import useInfoStore from "../../store/modules/info";
//获取小仓库对象
let infoStore = useInfoStore();

//引入组合式API函数仓库
import useTodoStore from "../../store/modules/todo";
let todoStore = useTodoStore();

//点击p段落去修改仓库的数据
const updateTodo = () => {
  todoStore.updateTodo();
};
</script>
2
3
4
5
6
7
8
9
10
11
12
13
14
15
16
17
18
19
20
21
22
# slot
插槽:默认插槽、具名插槽、作用域插槽可以实现父子组件通信.
默认插槽:
在子组件内部的模板中书写slot全局组件标签
<template>
  <div>
    <slot></slot>
  </div>
</template>
<script setup lang="ts">
</script>
<style scoped>
</style>
2
3
4
5
6
7
8
9
在父组件内部提供结构:Todo即为子组件,在父组件内部使用的时候,在双标签内部书写结构传递给子组件
注意开发项目的时候默认插槽一般只有一个
<Todo>
  <h1>我是默认插槽填充的结构</h1>
</Todo>
2
3
具名插槽:
顾名思义,此插槽带有名字在组件内部留多个指定名字的插槽。
下面是一个子组件内部,模板中留两个插槽
<template>
  <div>
    <h1>todo</h1>
    <slot name="a"></slot>
    <slot name="b"></slot>
  </div>
</template>
<script setup lang="ts">
</script>
2
3
4
5
6
7
8
9
父组件内部向指定的具名插槽传递结构。需要注意v-slot:可以替换为#
<template>
  <div>
    <h1>todo</h1>
    <slot name="a"></slot>
    <slot name="b"></slot>
  </div>
</template>
<script setup lang="ts">
</script>
2
3
4
5
6
7
8
9
父组件内部向指定的具名插槽传递结构。需要注意v-slot:可以替换为#
<template>
  <div>
    <h1>slot</h1>
    <Todo>
      <template v-slot:a>  //可以用#a替换
        <div>填入组件A部分的结构</div>
      </template>
      <template v-slot:b>//可以用#b替换
        <div>填入组件B部分的结构</div>
      </template>
    </Todo>
  </div>
</template>

<script setup lang="ts">
import Todo from "./Todo.vue";
</script>
2
3
4
5
6
7
8
9
10
11
12
13
14
15
16
17
作用域插槽
作用域插槽:可以理解为,子组件数据由父组件提供,但是子组件内部决定不了自身结构与外观(样式)
子组件Todo代码如下:
<template>
  <div>
    <h1>todo</h1>
    <ul>
     <!--组件内部遍历数组-->
      <li v-for="(item,index) in todos" :key="item.id">
         <!--作用域插槽将数据回传给父组件-->
         <slot :$row="item" :$index="index"></slot>
      </li>
    </ul>
  </div>
</template>
<script setup lang="ts">
defineProps(['todos']);//接受父组件传递过来的数据
</script>
<style scoped>
</style>
2
3
4
5
6
7
8
9
10
11
12
13
14
15
16
17
父组件内部代码如下:
<template>
  <div>
    <h1>slot</h1>
    <Todo :todos="todos">
      <template v-slot="{$row,$index}">
         <!--父组件决定子组件的结构与外观-->
         <span :style="{color:$row.done?'green':'red'}">{{$row.title}}</span>
      </template>
    </Todo>
  </div>
</template>

<script setup lang="ts">
import Todo from "./Todo.vue";
import { ref } from "vue";
//父组件内部数据
let todos = ref([
  { id: 1, title: "吃饭", done: true },
  { id: 2, title: "睡觉", done: false },
  { id: 3, title: "打豆豆", done: true },
]);
</script>
<style scoped>
</style>
2
3
4
5
6
7
8
9
10
11
12
13
14
15
16
17
18
19
20
21
22
23
24
完整代码:
<template>
  <div class="box">
    <h1>我是子组件默认插槽</h1>
    <!-- 默认插槽 -->
    <slot></slot>
    <h1>我是子组件默认插槽</h1>
    <h1>具名插槽填充数据</h1>
    <slot name="a"></slot>
    <h1>具名插槽填充数据</h1>
    <h1>具名插槽填充数据</h1>
    <slot name="b"></slot>
    <h1>具名插槽填充数据</h1>
  </div>
</template>

<script setup lang="ts">
</script>
2
3
4
5
6
7
8
9
10
11
12
13
14
15
16
17
父组件
<template>
  <div>
    <h1>slot</h1>
    <Test1 :todos="todos">
      <template v-slot="{ $row, $index }">
        <p :style="{ color: $row.done ? 'green' : 'red' }">
          {{ $row.title }}--{{ $index }}
        </p>
      </template>
    </Test1>
    <Test>
      <div>
        <pre>大江东去浪淘尽,千古分流人物</pre>
      </div>
      <!-- 具名插槽填充a -->
      <template #a>
        <div>我是填充具名插槽a位置结构</div>
      </template>
      <!-- 具名插槽填充b v-slot指令可以简化为# -->
      <template #b>
        <div>我是填充具名插槽b位置结构</div>
      </template>
    </Test>
  </div>
</template>

<script setup lang="ts">
import Test from "./Test.vue";
import Test1 from "./Test1.vue";
//插槽:默认插槽、具名插槽、作用域插槽
//作用域插槽:就是可以传递数据的插槽,子组件可以讲数据回传给父组件,父组件可以决定这些回传的
//数据是以何种结构或者外观在子组件内部去展示!!!

import { ref } from "vue";
//todos数据
let todos = ref([
  { id: 1, title: "吃饭", done: true },
  { id: 2, title: "睡觉", done: false },
  { id: 3, title: "打豆豆", done: true },
  { id: 4, title: "打游戏", done: false },
]);
</script>
2
3
4
5
6
7
8
9
10
11
12
13
14
15
16
17
18
19
20
21
22
23
24
25
26
27
28
29
30
31
32
33
34
35
36
37
38
39
40
41
42
作用域插槽组件
<template>
  <div class="box">
    <h1>作用域插槽</h1>
    <ul>
      <li v-for="(item, index) in todos" :key="item.id">
        <!--作用域插槽:可以讲数据回传给父组件-->
        <slot :$row="item" :$index="index"></slot>
      </li>
    </ul>
  </div>
</template>

<script setup lang="ts">
//通过props接受父组件传递数据
defineProps(["todos"]);
</script>
2
3
4
5
6
7
8
9
10
11
12
13
14
15
16
# 搭建后台管理系统模板
一个项目要有统一的规范,需要使用eslint+stylelint+prettier来对我们的代码质量做检测和修复,需要使用husky来做commit拦截,需要使用commitlint来统一提交规范,需要使用preinstall来统一包管理工具。
下面我们就用这一套规范来初始化我们的项目,集成一个规范的模版。
# 项目初始化
本项目使用vite进行构建,vite官方中文文档参考:cn.vitejs.dev/guide/ (opens new window)
pnpm:performant npm ,意味“高性能的 npm”。pnpm (opens new window)由npm/yarn衍生而来,解决了npm/yarn内部潜在的bug,极大的优化了性能,扩展了使用场景。被誉为“最先进的包管理工具”
pnpm安装指令
npm i -g pnpm
项目初始化命令:
pnpm create vite
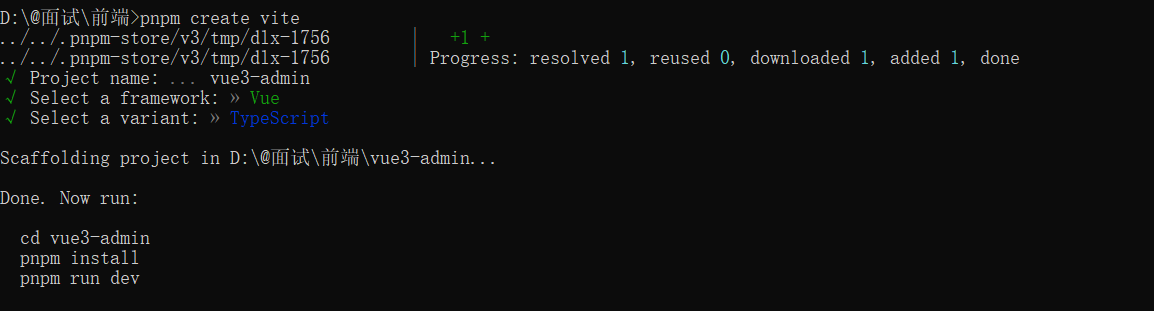
进入到项目根目录pnpm install安装全部依赖.安装完依赖运行程序:pnpm run dev
运行完毕项目跑在http://127.0.0.1:5173/,可以访问你得项目啦
配置项目运行时自动打开浏览器
  "scripts": {
    "dev": "vite --open",
    "build": "vue-tsc && vite build",
    "preview": "vite preview"
  },
2
3
4
5
# 项目配置
# eslint配置
eslint中文官网:http://eslint.cn/
ESLint最初是由Nicholas C. Zakas (opens new window) 于2013年6月创建的开源项目。它的目标是提供一个插件化的javascript代码检测工具
首先安装eslint
pnpm i eslint -D
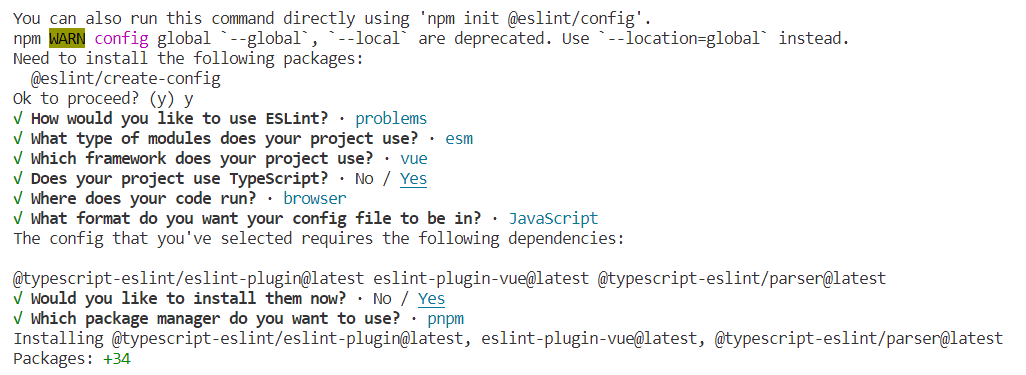
生成配置文件:.eslint.cjs
npx eslint --init
.eslint.cjs配置文件
module.exports = {
   //运行环境
    "env": {
        "browser": true,//浏览器端
        "es2021": true,//es2021
    },
    //规则继承
    "extends": [
       //全部规则默认是关闭的,这个配置项开启推荐规则,推荐规则参照文档
       //比如:函数不能重名、对象不能出现重复key
        "eslint:recommended",
        //vue3语法规则
        "plugin:vue/vue3-essential",
        //ts语法规则
        "plugin:@typescript-eslint/recommended"
    ],
    //要为特定类型的文件指定处理器
    "overrides": [
    ],
    //指定解析器:解析器
    //Esprima 默认解析器
    //Babel-ESLint babel解析器
    //@typescript-eslint/parser ts解析器
    "parser": "@typescript-eslint/parser",
    //指定解析器选项
    "parserOptions": {
        "ecmaVersion": "latest",//校验ECMA最新版本
        "sourceType": "module"//设置为"script"(默认),或者"module"代码在ECMAScript模块中
    },
    //ESLint支持使用第三方插件。在使用插件之前,您必须使用npm安装它
    //该eslint-plugin-前缀可以从插件名称被省略
    "plugins": [
        "vue",
        "@typescript-eslint"
    ],
    //eslint规则
    "rules": {
    }
}
2
3
4
5
6
7
8
9
10
11
12
13
14
15
16
17
18
19
20
21
22
23
24
25
26
27
28
29
30
31
32
33
34
35
36
37
38
39
vue3环境代码校验插件
# 让所有与prettier规则存在冲突的Eslint rules失效,并使用prettier进行代码检查
"eslint-config-prettier": "^8.6.0",
"eslint-plugin-import": "^2.27.5",
"eslint-plugin-node": "^11.1.0",
# 运行更漂亮的Eslint,使prettier规则优先级更高,Eslint优先级低
"eslint-plugin-prettier": "^4.2.1",
# vue.js的Eslint插件(查找vue语法错误,发现错误指令,查找违规风格指南
"eslint-plugin-vue": "^9.9.0",
# 该解析器允许使用Eslint校验所有babel code
"@babel/eslint-parser": "^7.19.1",
2
3
4
5
6
7
8
9
10
安装指令
pnpm install -D eslint-plugin-import eslint-plugin-vue eslint-plugin-node eslint-plugin-prettier eslint-config-prettier eslint-plugin-node @babel/eslint-parser
修改.eslintrc.cjs配置文件
// @see https://eslint.bootcss.com/docs/rules/

module.exports = {
  env: {
    browser: true,
    es2021: true,
    node: true,
    jest: true
  },
  /* 指定如何解析语法 */
  parser: 'vue-eslint-parser',
  /** 优先级低于 parse 的语法解析配置 */
  parserOptions: {
    ecmaVersion: 'latest',
    sourceType: 'module',
    parser: '@typescript-eslint/parser',
    jsxPragma: 'React',
    ecmaFeatures: {
      jsx: true
    }
  },
  /* 继承已有的规则 */
  extends: [
    'eslint:recommended',
    'plugin:vue/vue3-essential',
    'plugin:@typescript-eslint/recommended',
    'plugin:prettier/recommended'
  ],
  plugins: ['vue', '@typescript-eslint'],
  /*
   * "off" 或 0    ==>  关闭规则
   * "warn" 或 1   ==>  打开的规则作为警告(不影响代码执行)
   * "error" 或 2  ==>  规则作为一个错误(代码不能执行,界面报错)
   */
  rules: {
    // eslint(https://eslint.bootcss.com/docs/rules/)
    'no-var': 'error', // 要求使用 let 或 const 而不是 var
    'no-multiple-empty-lines': ['warn', { max: 1 }], // 不允许多个空行
    'no-console': process.env.NODE_ENV === 'production' ? 'error' : 'off',
    'no-debugger': process.env.NODE_ENV === 'production' ? 'error' : 'off',
    'no-unexpected-multiline': 'error', // 禁止空余的多行
    'no-useless-escape': 'off', // 禁止不必要的转义字符

    // typeScript (https://typescript-eslint.io/rules)
    '@typescript-eslint/no-unused-vars': 'error', // 禁止定义未使用的变量
    '@typescript-eslint/prefer-ts-expect-error': 'error', // 禁止使用 @ts-ignore
    '@typescript-eslint/no-explicit-any': 'off', // 禁止使用 any 类型
    '@typescript-eslint/no-non-null-assertion': 'off',
    '@typescript-eslint/no-namespace': 'off', // 禁止使用自定义 TypeScript 模块和命名空间。
    '@typescript-eslint/semi': 'off',

    // eslint-plugin-vue (https://eslint.vuejs.org/rules/)
    'vue/multi-word-component-names': 'off', // 要求组件名称始终为 “-” 链接的单词
    'vue/script-setup-uses-vars': 'error', // 防止<script setup>使用的变量<template>被标记为未使用
    'vue/no-mutating-props': 'off', // 不允许组件 prop的改变
    'vue/attribute-hyphenation': 'off', // 对模板中的自定义组件强制执行属性命名样式

    // 禁止 prettier 强制要求对象最后一个属性后加逗号
    'prettier/prettier': [
      'error',
      {
        trailingComma: 'none' // 设置为 'none' 表示禁用最后一个属性后的逗号
      }
    ]
  }
}
2
3
4
5
6
7
8
9
10
11
12
13
14
15
16
17
18
19
20
21
22
23
24
25
26
27
28
29
30
31
32
33
34
35
36
37
38
39
40
41
42
43
44
45
46
47
48
49
50
51
52
53
54
55
56
57
58
59
60
61
62
63
64
65
66
67
新建.eslintignore忽略文件
dist
node_modules
2
package.json新增两个运行脚本
"scripts": {
    "lint": "eslint src",
    "fix": "eslint src --fix",
}
2
3
4
# 配置prettier
有了eslint,为什么还要有prettier?eslint针对的是javascript,他是一个检测工具,包含js语法以及少部分格式问题,在eslint看来,语法对了就能保证代码正常运行,格式问题属于其次;
而prettier属于格式化工具,它看不惯格式不统一,所以它就把eslint没干好的事接着干,另外,prettier支持
包含js在内的多种语言。
总结起来,eslint和prettier这俩兄弟一个保证js代码质量,一个保证代码美观。
安装依赖包
pnpm install -D eslint-plugin-prettier prettier eslint-config-prettier
.prettierrc.json添加规则
{
  "singleQuote": true,
  "semi": false,
  "bracketSpacing": true,
  "htmlWhitespaceSensitivity": "ignore",
  "endOfLine": "auto",
  "trailingComma": "all",
  "tabWidth": 2
}
2
3
4
5
6
7
8
9
.prettierignore忽略文件
/dist/*
/html/*
.local
/node_modules/**
**/*.svg
**/*.sh
/public/*
2
3
4
5
6
7
通过pnpm run lint去检测语法,如果出现不规范格式,通过pnpm run fix 修改
# 配置stylelint
stylelint (opens new window)为css的lint工具。可格式化css代码,检查css语法错误与不合理的写法,指定css书写顺序等。
我们的项目中使用scss作为预处理器,安装以下依赖:
pnpm add sass sass-loader stylelint postcss postcss-scss postcss-html stylelint-config-prettier stylelint-config-recess-order stylelint-config-recommended-scss stylelint-config-standard stylelint-config-standard-vue stylelint-scss stylelint-order stylelint-config-standard-scss -D
.stylelintrc.cjs配置文件
官网:https://stylelint.bootcss.com/
// @see https://stylelint.bootcss.com/

module.exports = {
  extends: [
    'stylelint-config-standard', // 配置stylelint拓展插件
    'stylelint-config-html/vue', // 配置 vue 中 template 样式格式化
    'stylelint-config-standard-scss', // 配置stylelint scss插件
    'stylelint-config-recommended-vue/scss', // 配置 vue 中 scss 样式格式化
    'stylelint-config-recess-order', // 配置stylelint css属性书写顺序插件,
    'stylelint-config-prettier', // 配置stylelint和prettier兼容
  ],
  overrides: [
    {
      files: ['**/*.(scss|css|vue|html)'],
      customSyntax: 'postcss-scss',
    },
    {
      files: ['**/*.(html|vue)'],
      customSyntax: 'postcss-html',
    },
  ],
  ignoreFiles: [
    '**/*.js',
    '**/*.jsx',
    '**/*.tsx',
    '**/*.ts',
    '**/*.json',
    '**/*.md',
    '**/*.yaml',
  ],
  /**
   * null  => 关闭该规则
   * always => 必须
   */
  rules: {
    'value-keyword-case': null, // 在 css 中使用 v-bind,不报错
    'no-descending-specificity': null, // 禁止在具有较高优先级的选择器后出现被其覆盖的较低优先级的选择器
    'function-url-quotes': 'always', // 要求或禁止 URL 的引号 "always(必须加上引号)"|"never(没有引号)"
    'no-empty-source': null, // 关闭禁止空源码
    'selector-class-pattern': null, // 关闭强制选择器类名的格式
    'property-no-unknown': null, // 禁止未知的属性(true 为不允许)
    'block-opening-brace-space-before': 'always', //大括号之前必须有一个空格或不能有空白符
    'value-no-vendor-prefix': null, // 关闭 属性值前缀 --webkit-box
    'property-no-vendor-prefix': null, // 关闭 属性前缀 -webkit-mask
    'selector-pseudo-class-no-unknown': [
      // 不允许未知的选择器
      true,
      {
        ignorePseudoClasses: ['global', 'v-deep', 'deep'], // 忽略属性,修改element默认样式的时候能使用到
      },
    ],
  },
}
2
3
4
5
6
7
8
9
10
11
12
13
14
15
16
17
18
19
20
21
22
23
24
25
26
27
28
29
30
31
32
33
34
35
36
37
38
39
40
41
42
43
44
45
46
47
48
49
50
51
52
53
.stylelintignore忽略文件
/node_modules/*
/dist/*
/html/*
/public/*
2
3
4
运行脚本
"scripts": {
	"lint:style": "stylelint src/**/*.{css,scss,vue} --cache --fix"
}
2
3
最后配置统一的prettier来格式化我们的js和css,html代码
  "scripts": {
    "dev": "vite --open",
    "build": "vue-tsc && vite build",
    "preview": "vite preview",
    "lint": "eslint src",
    "fix": "eslint src --fix",
    "format": "prettier --write \"./**/*.{html,vue,ts,js,json,md}\"",
    "lint:eslint": "eslint src/**/*.{ts,vue} --cache --fix",
    "lint:style": "stylelint src/**/*.{css,scss,vue} --cache --fix"
  },
2
3
4
5
6
7
8
9
10
当我们运行pnpm run format的时候,会把代码直接格式化
# 配置husky
在上面我们已经集成好了我们代码校验工具,但是需要每次手动的去执行命令才会格式化我们的代码。如果有人没有格式化就提交了远程仓库中,那这个规范就没什么用。所以我们需要强制让开发人员按照代码规范来提交。
要做到这件事情,就需要利用husky在代码提交之前触发git hook(git在客户端的钩子),然后执行pnpm run format来自动的格式化我们的代码。
安装husky
pnpm install -D husky
执行
npx husky-init
WARN Issues with peer dependencies found . └─┬ stylelint-config-prettier 9.0.5 └── ✕ unmet peer stylelint@">= 11.x < 15": found 15.10.3
会在根目录下生成个一个.husky目录,在这个目录下面会有一个pre-commit文件,这个文件里面的命令在我们执行commit的时候就会执行
在.husky/pre-commit文件添加如下命令:
#!/usr/bin/env sh
. "$(dirname -- "$0")/_/husky.sh"
pnpm run format
2
3
当我们对代码进行commit操作的时候,就会执行命令,对代码进行格式化,然后再提交。
# 配置commitlint
对于我们的commit信息,也是有统一规范的,不能随便写,要让每个人都按照统一的标准来执行,我们可以利用commitlint来实现。
安装包
pnpm add @commitlint/config-conventional @commitlint/cli -D
添加配置文件,新建commitlint.config.cjs(注意是cjs),然后添加下面的代码:
module.exports = {
  extends: ['@commitlint/config-conventional'],
  // 校验规则
  rules: {
    'type-enum': [
      2,
      'always',
      [
        'feat',
        'fix',
        'docs',
        'style',
        'refactor',
        'perf',
        'test',
        'chore',
        'revert',
        'build',
      ],
    ],
    'type-case': [0],
    'type-empty': [0],
    'scope-empty': [0],
    'scope-case': [0],
    'subject-full-stop': [0, 'never'],
    'subject-case': [0, 'never'],
    'header-max-length': [0, 'always', 72],
  },
}
2
3
4
5
6
7
8
9
10
11
12
13
14
15
16
17
18
19
20
21
22
23
24
25
26
27
28
29
在package.json中配置scripts命令
# 在scrips中添加下面的代码
{
"scripts": {
    "commitlint": "commitlint --config commitlint.config.cjs -e -V"
  },
}
2
3
4
5
6
配置结束,现在当我们填写commit信息的时候,前面就需要带着下面的subject
'feat',//新特性、新功能
'fix',//修改bug
'docs',//文档修改
'style',//代码格式修改, 注意不是 css 修改
'refactor',//代码重构
'perf',//优化相关,比如提升性能、体验
'test',//测试用例修改
'chore',//其他修改, 比如改变构建流程、或者增加依赖库、工具等
'revert',//回滚到上一个版本
'build',//编译相关的修改,例如发布版本、对项目构建或者依赖的改动
2
3
4
5
6
7
8
9
10
配置husky
npx husky add .husky/commit-msg
在生成的commit-msg文件中添加下面的命令
#!/usr/bin/env sh
. "$(dirname -- "$0")/_/husky.sh"
pnpm commitlint
2
3
当我们 commit 提交信息时,就不能再随意写了,必须是 git commit -m 'fix: xxx' 符合类型的才可以,需要注意的是类型的后面需要用英文的 :,并且冒号后面是需要空一格的,这个是不能省略的
错误解决,由于使用了nvm (opens new window),不能正确识别node路径,执行代码提交后,husky一直报错
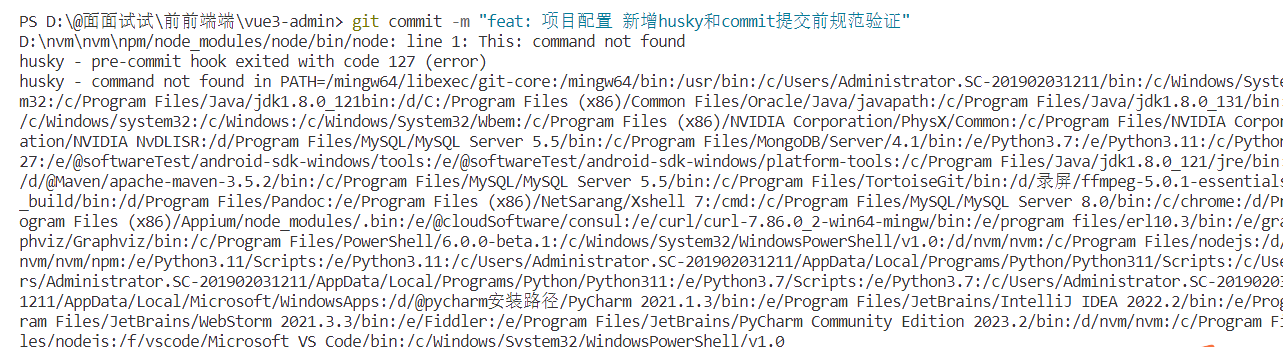
解决方案:https://blog.csdn.net/qq_39852145/article/details/123867238
在用户根目录C:\Users\你的用户名(C:\Users\Administrator.SC-201902031211)创建.huskyrc文件
在Windows命令提示符上使用notepad创建.huskyrc文件:
notepad %userprofile%\.huskyrc
复制下面内容到这个文件中
# ~/.huskyrc
# This uses nvm.exe to set the Node.js version before running the hook

# Specify the path to nvm.exe (update with the actual path on your system)
NVM_EXE_PATH="D:/nvm/nvm/nvm.exe"

# Use nvm.exe to set the Node.js version (replace "node_version" with the desired version)
"$NVM_EXE_PATH" use node_version

# Optionally, you can update the PATH to include the selected Node.js version
# This may not be necessary depending on your use case
export PATH="$NVM_DIR:$PATH"
2
3
4
5
6
7
8
9
10
11
12
最后没成功放弃使用这个功能
# 强制使用pnpm包管理器工具
团队开发项目的时候,需要统一包管理器工具,因为不同包管理器工具下载同一个依赖,可能版本不一样,
导致项目出现bug问题,因此包管理器工具需要统一管理!!!
在根目录创建scritps/preinstall.js文件,添加下面的内容
if (!/pnpm/.test(process.env.npm_execpath || '')) {
  console.warn(
    `\u001b[33mThis repository must using pnpm as the package manager ` +
    ` for scripts to work properly.\u001b[39m\n`,
  )
  process.exit(1)
}
2
3
4
5
6
7
配置命令
"scripts": {
	"preinstall": "node ./scripts/preinstall.js"
}
2
3
当我们使用npm或者yarn来安装包的时候,就会报错了。原理就是在install的时候会触发preinstall(npm提供的生命周期钩子)这个文件里面的代码。
# 项目集成
# 集成element-plus
官网地址:https://element-plus.gitee.io/zh-CN/
pnpm install element-plus @element-plus/icons-vue
入口文件main.ts全局安装element-plus,element-plus默认支持语言英语设置为中文
src/main.ts
import { createApp } from 'vue'
import './style.css'
import App from './App.vue'
// 引入ElementPlus
import ElementPlus from 'element-plus'
import 'element-plus/dist/index.css'
// @ts-expect-error忽略当前文件ts类型的检测否则有红色提示(打包会失败)
import zhCn from 'element-plus/dist/locale/zh-cn.mjs'
const app = createApp(App)

app.use(ElementPlus, {
  locale: zhCn,
})
app.mount('#app')
2
3
4
5
6
7
8
9
10
11
12
13
14
配置完毕可以测试element-plus组件与图标的使用.
# src别名的配置
在开发项目的时候文件与文件关系可能很复杂,因此我们需要给src文件夹配置一个别名!!!
vite.config.ts
import { defineConfig } from 'vite'
import vue from '@vitejs/plugin-vue'
import path from 'path'

// https://vitejs.dev/config/
export default defineConfig({
  plugins: [vue()],
  resolve: {
    alias: {
      '@': path.resolve('./src'), // 相对路径别名配置,使用 @ 代替 src
    },
  },
})
2
3
4
5
6
7
8
9
10
11
12
13
TypeScript 编译配置
// tsconfig.json
{
  "compilerOptions": {
    "baseUrl": "./", // 解析非相对模块的基地址,默认是当前目录
    "paths": { //路径映射,相对于baseUrl
      "@/*": ["src/*"]
    }
  }
}
2
3
4
5
6
7
8
9
# 环境变量的配置
项目开发过程中,至少会经历开发环境、测试环境和生产环境(即正式环境)三个阶段。不同阶段请求的状态(如接口地址等)不尽相同,若手动切换接口地址是相当繁琐且易出错的。于是环境变量配置的需求就应运而生,我们只需做简单的配置,把环境状态切换的工作交给代码。
开发环境(development) 顾名思义,开发使用的环境,每位开发人员在自己的dev分支上干活,开发到一定程度,同事会合并代码,进行联调。
测试环境(testing) 测试同事干活的环境啦,一般会由测试同事自己来部署,然后在此环境进行测试
生产环境(production) 生产环境是指正式提供对外服务的,一般会关掉错误报告,打开错误日志。(正式提供给客户使用的环境。)
注意:一般情况下,一个环境对应一台服务器,也有的公司开发与测试环境是一台服务器!!!
项目根目录分别添加 开发、生产和测试环境的文件!
.env.development
.env.production
.env.test
2
3
文件内容
# 变量必须以 VITE_ 为前缀才能暴露给外部读取
NODE_ENV = 'development'
VITE_APP_TITLE = '爱写bug的小邓程序员'
VITE_APP_BASE_API = '/dev-api'
2
3
4
NODE_ENV = 'production'
VITE_APP_TITLE = '爱写bug的小邓程序员'
VITE_APP_BASE_API = '/prod-api'
2
3
# 变量必须以 VITE_ 为前缀才能暴露给外部读取
NODE_ENV = 'test'
VITE_APP_TITLE = '爱写bug的小邓程序员'
VITE_APP_BASE_API = '/test-api'
2
3
4
配置运行命令:package.json
 "scripts": {
    "dev": "vite --open",
    "build:test": "vue-tsc && vite build --mode test",
    "build:pro": "vue-tsc && vite build --mode production",
    "preview": "vite preview"
  },
2
3
4
5
6
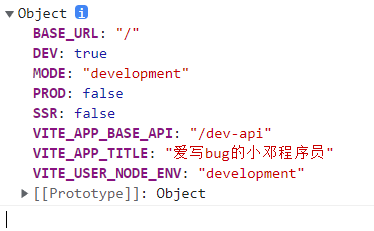
通过import.meta.env获取环境变量
console.log(import.meta.env)
# SVG图标配置
在开发项目的时候经常会用到svg矢量图,而且我们使用SVG以后,页面上加载的不再是图片资源,
这对页面性能来说是个很大的提升,而且我们SVG文件比img要小的很多,放在项目中几乎不占用资源。
安装SVG依赖插件
pnpm install vite-plugin-svg-icons -D
在vite.config.ts中配置插件
这里配置了svg图片放在src/assets/icons目录下
import { createSvgIconsPlugin } from 'vite-plugin-svg-icons'
import path from 'path'
export default () => {
  return {
    plugins: [
      createSvgIconsPlugin({
        // Specify the icon folder to be cached
        iconDirs: [path.resolve(process.cwd(), 'src/assets/icons')],
        // Specify symbolId format
        symbolId: 'icon-[dir]-[name]',
      }),
    ],
  }
}
2
3
4
5
6
7
8
9
10
11
12
13
14
入口文件导入
src/main.ts
import 'virtual:svg-icons-register'
阿里iconfont复制一个svg图片
测试使用
  <svg style="width: 32px; height: 32px">
    <use xlink:href="#icon-test" fill="red"></use>
  </svg>
2
3
# svg封装为全局组件
因为项目很多模块需要使用图标,因此把它封装为全局组件!!!
在src/components目录下创建一个SvgIcon组件:代码如下
<template>
  <div>
    <svg :style="{ width: width, height: height }">
      <use :xlink:href="prefix + name" :fill="color"></use>
    </svg>
  </div>
</template>

<script setup lang="ts">
defineProps({
  //xlink:href属性值的前缀
  prefix: {
    type: String,
    default: '#icon-'
  },
  //svg矢量图的名字
  name: String,
  //svg图标的颜色
  color: {
    type: String,
    default: ''
  },
  //svg宽度
  width: {
    type: String,
    default: '16px'
  },
  //svg高度
  height: {
    type: String,
    default: '16px'
  }
})
</script>
<style scoped></style>
2
3
4
5
6
7
8
9
10
11
12
13
14
15
16
17
18
19
20
21
22
23
24
25
26
27
28
29
30
31
32
33
34
35
在src文件夹目录下创建一个index.ts文件:用于注册components文件夹内部全部全局组件!!!
src/components/index.ts
import SvgIcon from './SvgIcon/index.vue'
import type { App, Component } from 'vue'
const components: { [name: string]: Component } = { SvgIcon }
export default {
  install(app: App) {
    Object.keys(components).forEach((key: string) => {
      app.component(key, components[key])
    })
  }
}
2
3
4
5
6
7
8
9
10
在入口文件引入src/main.ts文件,通过app.use方法安装自定义插件
import gloablComponent from './components/index';
app.use(gloablComponent);
2
测试使用
<svg-icon name="test"></svg-icon>
# 集成sass
我们目前在组件内部已经可以使用scss样式,因为在配置styleLint工具的时候,项目当中已经安装过sass sass-loader,因此我们再组件内可以使用scss语法!!!需要加上lang="scss"
<style scoped lang="scss"></style>
接下来我们为项目添加一些全局的样式
在src/styles目录下创建一个index.scss文件,当然项目中需要用到清除默认样式,因此在index.scss引入reset.scss
src/styles/reset.css
*,
*:after,
*:before {
    box-sizing: border-box;

    outline: none;
}

html,
body,
div,
span,
applet,
object,
iframe,
h1,
h2,
h3,
h4,
h5,
h6,
p,
blockquote,
pre,
a,
abbr,
acronym,
address,
big,
cite,
code,
del,
dfn,
em,
img,
ins,
kbd,
q,
s,
samp,
small,
strike,
strong,
sub,
sup,
tt,
var,
b,
u,
i,
center,
dl,
dt,
dd,
ol,
ul,
li,
fieldset,
form,
label,
legend,
table,
caption,
tbody,
tfoot,
thead,
tr,
th,
td,
article,
aside,
canvas,
details,
embed,
figure,
figcaption,
footer,
header,
hgroup,
menu,
nav,
output,
ruby,
section,
summary,
time,
mark,
audio,
video {
    font: inherit;
    font-size: 100%;

    margin: 0;
    padding: 0;

    vertical-align: baseline;

    border: 0;
}

article,
aside,
details,
figcaption,
figure,
footer,
header,
hgroup,
menu,
nav,
section {
    display: block;
}

body {
    line-height: 1;
}

ol,
ul {
    list-style: none;
}

blockquote,
q {
    quotes: none;

    &:before,
    &:after {
        content: '';
        content: none;
    }
}

sub,
sup {
    font-size: 75%;
    line-height: 0;

    position: relative;

    vertical-align: baseline;
}

sup {
    top: -.5em;
}

sub {
    bottom: -.25em;
}

table {
    border-spacing: 0;
    border-collapse: collapse;
}

input,
textarea,
button {
    font-family: inhert;
    font-size: inherit;

    color: inherit;
}

select {
    text-indent: .01px;
    text-overflow: '';

    border: 0;
    border-radius: 0;

    -webkit-appearance: none;
    -moz-appearance: none;
}

select::-ms-expand {
    display: none;
}

code,
pre {
    font-family: monospace, monospace;
    font-size: 1em;
}
2
3
4
5
6
7
8
9
10
11
12
13
14
15
16
17
18
19
20
21
22
23
24
25
26
27
28
29
30
31
32
33
34
35
36
37
38
39
40
41
42
43
44
45
46
47
48
49
50
51
52
53
54
55
56
57
58
59
60
61
62
63
64
65
66
67
68
69
70
71
72
73
74
75
76
77
78
79
80
81
82
83
84
85
86
87
88
89
90
91
92
93
94
95
96
97
98
99
100
101
102
103
104
105
106
107
108
109
110
111
112
113
114
115
116
117
118
119
120
121
122
123
124
125
126
127
128
129
130
131
132
133
134
135
136
137
138
139
140
141
142
143
144
145
146
147
148
149
150
151
152
153
154
155
156
157
158
159
160
161
162
163
164
165
166
167
168
169
170
171
172
173
174
175
176
177
178
179
180
181
182
183
184
185
186
src/styles/index.scss
//引入清除默认样式
@import 'reset.scss'
2
在入口文件引入src/main.ts
// 引入css样式
import '@/styles/index.scss'
2
但是你会发现在src/styles/index.scss全局样式文件中没有办法使用$变量.因此需要给项目中引入全局变量$.
在src/styles/variable.scss创建一个variable.scss文件!
//项目提供scss全局变量
//定义项目主题颜色
$red:red;
$blue:blue;
2
3
4
在vite.config.ts文件配置如下:
import { defineConfig } from 'vite'
import vue from '@vitejs/plugin-vue'
import path from 'path'
import { createSvgIconsPlugin } from 'vite-plugin-svg-icons'

// https://vitejs.dev/config/
export default defineConfig(() => {
  return {
    plugins: [
      vue(),
      // 配置svg
      createSvgIconsPlugin({
        // Specify the icon folder to be cached
        iconDirs: [path.resolve(process.cwd(), 'src/assets/icons')],
        // Specify symbolId format
        symbolId: 'icon-[dir]-[name]'
      })
    ],
    resolve: {
      alias: {
        '@': path.resolve('./src') // 相对路径别名配置,使用 @ 代替 src
      }
    },
    // 配置全局css变量
    css: {
      preprocessorOptions: {
        scss: {
          javascriptEnabled: true,
          additionalData: '@import "./src/styles/variable.scss";'
        }
      }
    }
  }
})
2
3
4
5
6
7
8
9
10
11
12
13
14
15
16
17
18
19
20
21
22
23
24
25
26
27
28
29
30
31
32
33
34
@import "./src/styles/variable.less";后面的;不要忘记,不然会报错!
配置完毕你会发现scss提供这些全局变量可以在组件样式中使用了!!!
测试使用
<style lang="scss" scoped>
.hello {
  color: $red;
}
</style>
2
3
4
5
# mock数据
安装依赖:https://www.npmjs.com/package/vite-plugin-mock
pnpm install -D vite-plugin-mock@2.9.6 mockjs
在 vite.config.ts 配置文件启用插件。
import { defineConfig } from 'vite'
import vue from '@vitejs/plugin-vue'
// mock插件
import { viteMockServe } from 'vite-plugin-mock'

// https://vitejs.dev/config/
export default defineConfig(({ command }) => {
  return {
    plugins: [
      vue(),
      // 配置mock
      viteMockServe({
        localEnabled: command === 'serve'
      })
    ]
  }
})
2
3
4
5
6
7
8
9
10
11
12
13
14
15
16
17
18
在根目录创建mock文件夹:去创建我们需要mock数据与接口!!!
在mock文件夹内部创建一个user.ts文件
//用户信息数据
function createUserList() {
  return [
    {
      userId: 1,
      avatar:
        'https://wpimg.wallstcn.com/f778738c-e4f8-4870-b634-56703b4acafe.gif',
      username: 'admin',
      password: '123456',
      desc: '平台管理员',
      roles: ['平台管理员'],
      buttons: ['cuser.detail'],
      routes: ['home'],
      token: 'Admin Token'
    },
    {
      userId: 2,
      avatar:
        'https://wpimg.wallstcn.com/f778738c-e4f8-4870-b634-56703b4acafe.gif',
      username: 'system',
      password: '123456',
      desc: '系统管理员',
      roles: ['系统管理员'],
      buttons: ['cuser.detail', 'cuser.user'],
      routes: ['home'],
      token: 'System Token'
    }
  ]
}

export default [
  // 用户登录接口
  {
    url: '/api/user/login', //请求地址
    method: 'post', //请求方式
    response: ({ body }) => {
      //获取请求体携带过来的用户名与密码
      const { username, password } = body
      //调用获取用户信息函数,用于判断是否有此用户
      const checkUser = createUserList().find(
        (item) => item.username === username && item.password === password
      )
      //没有用户返回失败信息
      if (!checkUser) {
        return { code: 201, data: { message: '账号或者密码不正确' } }
      }
      //如果有返回成功信息
      const { token } = checkUser
      return { code: 200, data: { token } }
    }
  },
  // 获取用户信息
  {
    url: '/api/user/info',
    method: 'get',
    response: (request) => {
      //获取请求头携带token
      const token = request.headers.token
      //查看用户信息是否包含有次token用户
      const checkUser = createUserList().find((item) => item.token === token)
      //没有返回失败的信息
      if (!checkUser) {
        return { code: 201, data: { message: '获取用户信息失败' } }
      }
      //如果有返回成功信息
      return { code: 200, data: { checkUser } }
    }
  },
  // 退出登陆
  {
    url: '/api/logout',
    method: 'get',
    response: (request) => {
      //获取请求头携带token
      const token = request.headers.token
      //没有返回失败的信息
      if (!token) {
        return { code: 201, data: { message: '退出失败' } }
      }
      //如果有返回成功信息
      return { code: 200, data: { message: '退出成功' } }
    }
  }
]
2
3
4
5
6
7
8
9
10
11
12
13
14
15
16
17
18
19
20
21
22
23
24
25
26
27
28
29
30
31
32
33
34
35
36
37
38
39
40
41
42
43
44
45
46
47
48
49
50
51
52
53
54
55
56
57
58
59
60
61
62
63
64
65
66
67
68
69
70
71
72
73
74
75
76
77
78
79
80
81
82
83
84
报错
vite.config.ts报错信息
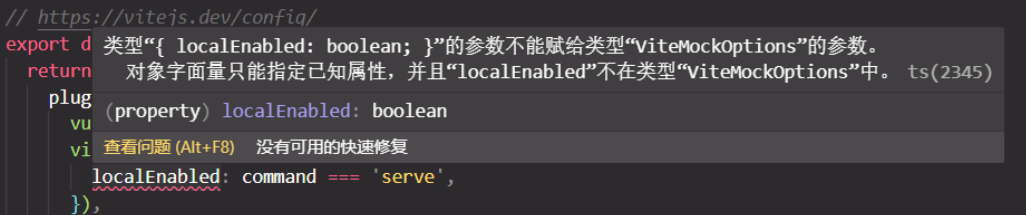
发现vite-plugin-mock 版本是3.0.0降低版本至2.9.6
# 安装axios
pnpm install axios
测试请求
<script setup lang="ts">
import axios from 'axios'
import { onMounted } from 'vue'
onMounted(() => {
let data = {
username: 'admin',
password: '123456'
}
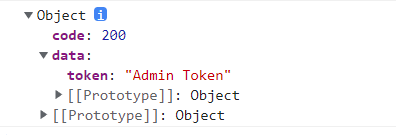
axios.post('/api/user/login', data).then((res) => {
console.log(res.data)
})
})
</script>
<template>
</template>
<style scoped></style>
2
3
4
5
6
7
8
9
10
11
12
13
14
15
16
17
18
# axios二次封装
在开发项目的时候避免不了与后端进行交互,因此我们需要使用axios插件实现发送网络请求。在开发项目的时候
我们经常会把axios进行二次封装。
目的:
1:使用请求拦截器,可以在请求拦截器中处理一些业务(开始进度条、请求头携带公共参数)
2:使用响应拦截器,可以在响应拦截器中处理一些业务(进度条结束、简化服务器返回的数据、处理http网络错误)
在根目录下创建utils/request.ts
import axios from 'axios'
import { ElMessage } from 'element-plus'
const request = axios.create({
  baseURL: import.meta.env.VITE_APP_BASE_API,
  timeout: 500
})

//请求拦截器
request.interceptors.request.use((config) => {
  return config
})

// 响应拦截器
request.interceptors.response.use(
  (response) => {
    return response.data
  },
  (error) => {
    //处理网络错误
    let msg = ''
    const status = error.response.status
    switch (status) {
      case 401:
        msg = 'token过期'
        break
      case 403:
        msg = '无权访问'
        break
      case 404:
        msg = '请求地址错误'
        break
      case 500:
        msg = '服务器出现问题'
        break
      default:
        msg = '无网络'
    }
    ElMessage({
      type: 'error',
      message: msg
    })
    return Promise.reject(error)
  }
)
export default request
2
3
4
5
6
7
8
9
10
11
12
13
14
15
16
17
18
19
20
21
22
23
24
25
26
27
28
29
30
31
32
33
34
35
36
37
38
39
40
41
42
43
44
45
# API接口统一管理
在开发项目的时候,接口可能很多需要统一管理。在src目录下去创建api文件夹去统一管理项目的接口;
比如:下面方式
src/api/user/index.ts
//统一管理咱们项目用户相关的接口

import request from '@/utils/request'

import type {
  loginFormData,
  loginResponseData,
  userInfoReponseData
} from './type'
//项目用户相关的请求地址

enum API {
  LOGIN_URL = '/admin/acl/index/login',
  USERINFO_URL = '/admin/acl/index/info',
  LOGOUT_URL = '/admin/acl/index/logout',
  TEST_LOGIN_URL = '/user/login'
}
// MOCK测试登陆接口
export const testLogin = (data: loginFormData) =>
  request.post<any, loginResponseData>(API.TEST_LOGIN_URL, data)

//登录接口
export const reqLogin = (data: loginFormData) =>
  request.post<any, loginResponseData>(API.LOGIN_URL, data)

//获取用户信息
export const reqUserInfo = () =>
  request.get<any, userInfoReponseData>(API.USERINFO_URL)

//退出登录
export const reqLogout = () => request.post<any, any>(API.LOGOUT_URL)
2
3
4
5
6
7
8
9
10
11
12
13
14
15
16
17
18
19
20
21
22
23
24
25
26
27
28
29
30
31
src/api/user/type.ts
//定义用户相关数据的ts类型
//用户登录接口携带参数的ts类型
export interface loginFormData {
  username: string
  password: string
}

//定义全部接口返回数据都拥有ts类型
export interface ResponseData {
  code: number
  message: string
  ok: boolean
}

//定义登录接口返回数据类型
export interface loginResponseData extends ResponseData {
  data: string
}

//定义获取用户信息返回数据类型
export interface userInfoReponseData extends ResponseData {
  data: {
    routes: string[]
    buttons: string[]
    roles: string[]
    name: string
    avatar: string
  }
}
2
3
4
5
6
7
8
9
10
11
12
13
14
15
16
17
18
19
20
21
22
23
24
25
26
27
28
29
测试使用
<script setup lang="ts">
// import axios from 'axios'
import { Check, Edit } from '@element-plus/icons-vue'
import HelloWorld from '@/components/HelloWorld.vue'
import { onMounted } from 'vue'
import { testLogin } from './api/user/index'
console.log(import.meta.env)
onMounted(() => {
  let data = {
    username: 'admin',
    password: '123456'
  }
  // axios.post('/api/user/login', data).then((res) => {
  //   console.log(res.data)
  // })
  testLogin(data).then((res) => {
    console.log(res)
  })
})
</script>

<template>
  <el-button type="primary" :icon="Edit" circle />
  <el-button type="success" :icon="Check" circle />
  <svg style="width: 32px; height: 32px">
    <use xlink:href="#icon-test" fill="red"></use>
  </svg>
  <svg-icon name="test"></svg-icon>
  <HelloWorld />
</template>

<style scoped></style>
2
3
4
5
6
7
8
9
10
11
12
13
14
15
16
17
18
19
20
21
22
23
24
25
26
27
28
29
30
31
32
# 路由配置
安装指令
pnpm install vue-router
# 搭建页面xxx.vue
src/views/404/index.vue
<script setup lang="ts"></script>

<template>
  <h1>404页面</h1>
</template>

<style scoped></style>
2
3
4
5
6
7
其他页面也要创建
在App.vue中使用router-view
<template>
  <div>
    <router-view></router-view>
  </div>
</template>
2
3
4
5
# 配置routes
src/router/routes.ts
// 对外暴露配置路由(常量路由):全部用户都可以访问到的路由
export const constantRoute = [
  {
    // 登陆页面
    path: '/login',
    component: () => import('@/views/login/index.vue'),
    name: 'login',
    meta: {
      title: '登录', //菜单标题
      hidden: true, //代表路由标题在菜单中是否隐藏  true:隐藏 false:不隐藏
      icon: 'Promotion' //菜单文字左侧的图标,支持element-plus全部图标
    }
  },
  {
    //登录成功以后展示数据的路由
    path: '/',
    component: () => import('@/layout/index.vue'),
    name: 'layout',
    meta: {
      title: '',
      hidden: false,
      icon: ''
    },
    redirect: '/home',
    children: [
      {
        path: '/home',
        component: () => import('@/views/home/index.vue'),
        meta: {
          title: '首页',
          hidden: false,
          icon: 'HomeFilled'
        }
      }
    ]
  },
  {
    //404
    path: '/404',
    component: () => import('@/views/404/index.vue'),
    name: '404',
    meta: {
      title: '404',
      hidden: true,
      icon: 'DocumentDelete'
    }
  },
  {
    path: '/screen',
    component: () => import('@/views/screen/index.vue'),
    name: 'Screen',
    meta: {
      hidden: false,
      title: '数据大屏',
      icon: 'Platform'
    }
  }
]

//任意路由
export const anyRoute = {
  //任意路由
  path: '/:pathMatch(.*)*',
  redirect: '/404',
  name: 'Any',
  meta: {
    title: '任意路由',
    hidden: true,
    icon: 'DataLine'
  }
}
2
3
4
5
6
7
8
9
10
11
12
13
14
15
16
17
18
19
20
21
22
23
24
25
26
27
28
29
30
31
32
33
34
35
36
37
38
39
40
41
42
43
44
45
46
47
48
49
50
51
52
53
54
55
56
57
58
59
60
61
62
63
64
65
66
67
68
69
70
71
src/router/index.ts
// 通过vue-router插件实现模板路由配置
import { createRouter, createWebHashHistory } from 'vue-router'
import { constantRoute } from './routes.ts'

// 创建路由器
const router = createRouter({
  // hash模式
  history: createWebHashHistory(),
  routes: constantRoute,
  //滚动行为
  scrollBehavior() {
    return {
      left: 0,
      top: 0
    }
  }
})

export default router
2
3
4
5
6
7
8
9
10
11
12
13
14
15
16
17
18
19
scrollBehavior 函数的目的是控制路由切换时页面滚动的位置。在这个函数中,返回一个包含 left 和 top 属性的对象,它们分别表示水平和垂直方向上的滚动位置。在这里,scrollBehavior 返回 { left: 0, top: 0 },表示每次路由切换后,页面会滚动到顶部的位置,即水平和垂直方向的滚动位置都为0。
这个滚动行为的作用是确保在页面切换时,新页面始终从顶部开始显示,而不会记住之前页面的滚动位置。这在某些情况下很有用,特别是在单页面应用程序(SPA)中,当用户浏览不同路由的内容时,希望每个页面都从顶部开始,而不会保留上一个页面的滚动位置。
如果你希望在路由切换时实现不同的滚动行为,可以在 scrollBehavior 函数中根据你的需求返回不同的滚动位置对象。例如,你可以根据路由的不同,设置不同的滚动位置,以便在用户浏览不同页面时有不同的滚动效果。
# 在src/main.ts中引入
import { createApp } from 'vue'
import App from './App.vue'

// 引入路由
import router from './router'
const app = createApp(App)

// 挂载路由
app.use(router)
app.mount('#app')
2
3
4
5
6
7
8
9
10
# Pina配置
安装
pnpm i pinia@2.0.34
src\store\index.ts
//仓库大仓库
import { createPinia } from 'pinia'
//创建大仓库
const pinia = createPinia()
//对外暴露:入口文件需要安装仓库
export default pinia
2
3
4
5
6
src/store/modules/types/index.ts
import type { RouteRecordRaw } from 'vue-router'
// 定义小仓库数据state类型
export interface UserState {
  token: string | null
  menuRoutes: RouteRecordRaw[]
  username: string
  avatar: string
  buttons: string[]
}
2
3
4
5
6
7
8
9
src/store/modules/user.ts
// 创建用户的小仓库
import { defineStore } from 'pinia'
import type { loginFormData, loginResponseData } from '@/api/user/type'
// 引入操作本地存储的工具方法
import { SET_TOKEN, GET_TOKEN, REMOVE_TOKEN } from '@/utils/token'
import { testLogin, testReqUserInfo, testReqLogout } from '@/api/user'
import type { UserState } from './types'

// 创建用户小仓库
const useUserStore = defineStore('User', {
  // 小仓库存储数据地方
  state: (): UserState => {
    return {
      token: GET_TOKEN(), //用户唯一标识token
      menuRoutes: [], //仓库存储生成菜单需要数组(路由)
      username: '',
      avatar: '',
      //存储当前用户是否包含某一个按钮
      buttons: []
    }
  },
  // 异步|逻辑的地方
  actions: {
    // 用户登录的方法
    async userLogin(data: loginFormData) {
      //登录请求
      const result: loginResponseData = await testLogin(data)
      //登录请求:成功200->token
      //登录请求:失败201->登录失败错误的信息
      if (result.code == 200) {
        //pinia仓库存储一下token
        //由于pinia|vuex存储数据其实利用js对象
        this.token = result.data.token as string
        //本地存储持久化存储一份
        SET_TOKEN(result.data.token as string)
        //能保证当前async函数返回一个成功的promise
        return Promise.resolve(result.data)
      } else {
        return Promise.reject(result.data)
      }
    },
    // 获取用户信息
    userInfo() {
      return new Promise((resolve, reject) => {
        testReqUserInfo()
          .then((result) => {
            this.username = result.data.name
            this.avatar = result.data.avatar
            this.buttons = result.data.buttons
            resolve(result)
          })
          .catch((error) => {
            reject(error)
          })
      })
    },
    // 退出登陆
    async userLogout() {
      //退出登录请求
      const result: any = await testReqLogout()
      if (result.code == 200) {
        //目前没有mock接口:退出登录接口(通知服务器本地用户唯一标识失效)
        this.token = ''
        this.username = ''
        this.avatar = ''
        REMOVE_TOKEN()
        return 'ok'
      } else {
        return Promise.reject(new Error(result.message))
      }
    }
  },
  getters: {}
})
// 对外暴露获取小仓库方法
export default useUserStore
2
3
4
5
6
7
8
9
10
11
12
13
14
15
16
17
18
19
20
21
22
23
24
25
26
27
28
29
30
31
32
33
34
35
36
37
38
39
40
41
42
43
44
45
46
47
48
49
50
51
52
53
54
55
56
57
58
59
60
61
62
63
64
65
66
67
68
69
70
71
72
73
74
75
76
src/main.ts
//引入仓库
import store from './store'
app.use(store)
2
3
# permisstion路由导航拦截
安装进度条
pnpm install --save nprogress
src/permisstion.ts
// 路由鉴权:鉴权,项目当中路由能不能被的权限的设置(某一个路由什么条件下可以访问、什么条件下不可以访问)
import router from '@/router'
//@ts-ignore
import NProgress from 'nprogress'
//引入进度条样式
import 'nprogress/nprogress.css'
NProgress.configure({ showSpinner: false })
//获取用户相关的小仓库内部token数据,去判断用户是否登录成功
import useUserStore from './store/modules/user'
import pinia from './store'
const userStore = useUserStore(pinia)

//全局守卫:项目当中任意路由切换都会触发的钩子
//全局前置守卫
router.beforeEach(async (to: any, from: any, next: any) => {
  // to:你将要访问那个路由
  // from:你从来个路由而来
  // next:路由的放行函数
  NProgress.start()
  //获取token,去判断用户登录、还是未登录
  const token = userStore.token
  //获取用户名字
  const username = userStore.username
  //用户登录判断
  if (token) {
    //登录成功,访问login,不能访问,指向首页
    if (to.path === '/login') {
      next({ path: '/' })
    } else {
      //登录成功访问其余六个路由(登录排除)
      //有用户信息
      if (username) {
        //放行
        next()
      } else {
        //如果没有用户信息,在守卫这里发请求获取到了用户信息再放行
        const res: any = await userStore.userInfo()
        if (res.code == 200) {
          // console.log('to', to)
          next()
          // next({ ...to })
        } else {
          //token过期:获取不到用户信息了
          //用户手动修改本地存储token
          //退出登录->用户相关的数据清空
          await userStore.userLogout()
          next({ path: '/login', query: { redirect: to.path } })
        }
      }
    }
  } else {
    //用户未登录判断
    if (to.path == '/login') {
      next()
    } else {
      next({ path: '/login', query: { redirect: to.path } })
    }
  }
})

//全局后置守卫
router.afterEach((to: any, from: any) => {
  NProgress.done()
})
2
3
4
5
6
7
8
9
10
11
12
13
14
15
16
17
18
19
20
21
22
23
24
25
26
27
28
29
30
31
32
33
34
35
36
37
38
39
40
41
42
43
44
45
46
47
48
49
50
51
52
53
54
55
56
57
58
59
60
61
62
63
64
# 登陆页面搭建
src\views\login\index.vue
<template>
  <div class="login_container">
    <el-row>
      <el-col :span="12" :xs="0"></el-col>
      <el-col :span="12" :xs="24">
        <el-form
          class="login_form"
          :model="loginForm"
          :rules="loginRules"
          ref="loginFormRef"
        >
          <h1>Hello</h1>
          <h2>爱写bug的小邓程序员</h2>
          <el-form-item prop="username">
            <el-input
              :prefix-icon="User"
              v-model="loginForm.username"
            ></el-input>
          </el-form-item>
          <el-form-item prop="password">
            <el-input
              type="password"
              :prefix-icon="Lock"
              v-model="loginForm.password"
              show-password
            ></el-input>
          </el-form-item>
          <el-form-item>
            <el-button
              :loading="loading"
              @click="login"
              class="login_btn"
              type="primary"
              size="default"
            >
              登录
            </el-button>
          </el-form-item>
        </el-form>
      </el-col>
    </el-row>
  </div>
</template>

<script setup lang="ts">
import { User, Lock } from '@element-plus/icons-vue'
import { ElMessage, ElNotification } from 'element-plus'
import type { FormRules, FormInstance } from 'element-plus'
import { reactive, ref } from 'vue'
// 引入用户相关的小仓库
import useUserStore from '@/store/modules/user'
let useStore = useUserStore()
import { useRoute, useRouter } from 'vue-router'
interface LoginForm {
  username: string
  password: string
}
let loading = ref(false)
// 路由器
let $router = useRouter()
// 路由对象
let $route = useRoute()
let loginFormRef = ref<FormInstance>()
// 收集账号与密码数据
let loginForm = reactive<LoginForm>({ username: 'admin', password: '123456' })
// 自定义校验规则
const validatorPassword = (rule: any, value: any, callback: any) => {
  if (value === '') {
    callback(new Error('请输入密码'))
  } else {
    if (value.length >= 6 && value.length <= 15) {
      callback()
    } else {
      callback(new Error('密码在6-15位'))
    }
  }
}
// 表单校验规则
const loginRules = reactive<FormRules<LoginForm>>({
  username: [
    {
      required: true,
      min: 5,
      max: 10,
      message: '账号长度5-10位',
      trigger: 'change'
    }
  ],
  password: [
    // {
    //   required: true,
    //   min: 6,
    //   max: 15,
    //   message: '密码长度至少6位',
    //   trigger: 'change'
    // }
    // 使用自定义校验规则
    { trigger: 'change', validator: validatorPassword }
  ]
})
// 登陆按钮回调函数
const login = async () => {
  // 保证全部表单相校验通过再发请求
  loginFormRef?.value?.validate(async (valid) => {
    if (valid) {
      loading.value = true
      useStore
        .userLogin(loginForm)
        .then(() => {
          //编程式导航跳转到展示数据首页
          //判断登录的时候,路由路径当中是否有query参数,如果有就往query参数挑战,没有跳转到首页
          let redirect: any = $route.query.redirect
          $router.push({ path: redirect || '/' })
          //登录成功加载效果也消失
          loading.value = false
          //登录成功提示信息
          ElNotification({
            type: 'success',
            message: '欢迎回来',
            title: `HI,您好,欢迎登陆`
          })
          loading.value = false
        })
        .catch((error) => {
          //登录失败加载效果消息
          loading.value = false
          //登录失败的提示信息
          ElNotification({
            type: 'error',
            message: error.message
          })
        })
    } else {
      ElMessage({
        message: '输入信息不合法',
        type: 'error'
      })
    }
  })
}
</script>

<style lang="scss" scoped>
.login_container {
  width: 100%;
  height: 100vh;
  background: url('@/assets/images/background.jpg') no-repeat;
  background-size: cover;
  .login_form {
    position: relative;
    width: 80%;
    top: 30vh;
    background: url('@/assets/images/login_form.png') no-repeat;
    background-size: cover;
    padding: 40px;
    h1 {
      color: white;
      font-size: 40px;
    }
    h2 {
      color: white;
      font-size: 20px;
      margin: 20px 0px;
    }
    .login_btn {
      width: 100%;
    }
  }
}
@media only screen and (max-width: 768px) {
  .login_form {
    left: 10%;
  }
}
</style>
2
3
4
5
6
7
8
9
10
11
12
13
14
15
16
17
18
19
20
21
22
23
24
25
26
27
28
29
30
31
32
33
34
35
36
37
38
39
40
41
42
43
44
45
46
47
48
49
50
51
52
53
54
55
56
57
58
59
60
61
62
63
64
65
66
67
68
69
70
71
72
73
74
75
76
77
78
79
80
81
82
83
84
85
86
87
88
89
90
91
92
93
94
95
96
97
98
99
100
101
102
103
104
105
106
107
108
109
110
111
112
113
114
115
116
117
118
119
120
121
122
123
124
125
126
127
128
129
130
131
132
133
134
135
136
137
138
139
140
141
142
143
144
145
146
147
148
149
150
151
152
153
154
155
156
157
158
159
160
161
162
163
164
165
166
167
168
169
170
171
172
173
174
175
自定义校验规则时候报错,不能校验原因
Uncaught TypeError: Cannot read properties of undefined (reading 'length')
    at Object.validatorPassword [as validator]
1
2不能写成v-model而要写成
:model
<el-form class="login_form" :model="loginForm" :rules="loginRules"></el-form>
# 表单校验规则
**:model:**绑定的数据
//收集账号与密码数据
let loginForm = reactive({ username: 'admin', password: '111111' })
2
:rules:对应要使用的规则
//定义表单校验需要的配置对象
const rules = {}
2
ref="loginForms":获取表单元素
//获取表单元素
let loginForms = ref()

import type { FormRules, FormInstance } from 'element-plus'
let loginFormRef = ref<FormInstance>()
2
3
4
5
使用规则rules
//定义表单校验需要的配置对象
const rules = {
  username: [
    //规则对象属性:
    {
      required: true, // required,代表这个字段务必要校验的
      min: 5, //min:文本长度至少多少位
      max: 10, // max:文本长度最多多少位
      message: '长度应为6-10位', // message:错误的提示信息
      trigger: 'change', //trigger:触发校验表单的时机 change->文本发生变化触发校验, blur:失去焦点的时候触发校验规则
    },

  ],
  password: [
   {
      required: true,
      min: 6,
      max: 10,
      message: '长度应为6-15位',
      trigger: 'change',
    },
  ],
}
2
3
4
5
6
7
8
9
10
11
12
13
14
15
16
17
18
19
20
21
22
23
校验规则通过后运行
const login = async () => {
  //保证全部表单项校验通过
  await loginForms.value.validate()
	。。。。。。
}

// 登陆按钮回调函数
const login = async () => {
  // 保证全部表单相校验通过再发请求
  loginFormRef?.value?.validate(async (valid) => {
    if (valid) {

    } else {

    }
  })
}
2
3
4
5
6
7
8
9
10
11
12
13
14
15
16
17
自定义表单校验
//定义表单校验需要的配置对象
const rules = {
  username: [
    //规则对象属性:
    /* {
      required: true, // required,代表这个字段务必要校验的
      min: 5, //min:文本长度至少多少位
      max: 10, // max:文本长度最多多少位
      message: '长度应为6-10位', // message:错误的提示信息
      trigger: 'change', //trigger:触发校验表单的时机 change->文本发生变化触发校验, blur:失去焦点的时候触发校验规则
    }, */
    { trigger: 'change', validator: validatorUserName },
  ],
  password: [
    { trigger: 'change', validator: validatorPassword },
  ],
}
2
3
4
5
6
7
8
9
10
11
12
13
14
15
16
17
自定义校验规则函数
//自定义校验规则函数
const validatorUserName = (rule: any, value: any, callback: any) => {
  //rule:校验规则对象
  //value:表单元素文本内容
  //callback:符合条件,callback放行通过,不符合:注入错误提示信息
  if (value.length >= 5) {
    callback()
  } else {
    callback(new Error('账号长度至少5位'))
  }
}

const validatorPassword = (rule: any, value: any, callback: any) => {
  if (value.length >= 6) {
    callback()
  } else {
    callback(new Error('密码长度至少6位'))
  }
}
2
3
4
5
6
7
8
9
10
11
12
13
14
15
16
17
18
19
# Layout模块
src/layout/index.vue
<template>
  <div class="layout_container">
    <!-- 左侧菜单 -->
    <div class="layout_slider"></div>
    <!-- 顶部导航 -->
    <div class="layout_tabbar"></div>
    <!-- 内容展示区域 -->
    <div class="layout_main">
      <p style="height: 1000000px"></p>
    </div>
  </div>
</template>

<script setup lang="ts"></script>

<style lang="scss" scoped>
.layout_container {
  width: 100%;
  height: 100vh;
  .layout_slider {
    width: $base-menu-width;
    height: 100vh;
    background: $base-menu-background;
  }
  .layout_tabbar {
    position: fixed;
    width: calc(100% - $base-menu-width);
    height: $base-tabbar-height;
    background: cyan;
    top: 0;
    left: $base-menu-width;
  }
  .layout_main {
    position: absolute;
    width: calc(100% - $base-menu-width);
    height: calc(100vh - $base-tabbar-height);
    background-color: yellowgreen;
    left: $base-menu-width;
    top: $base-tabbar-height;
    padding: 20px;
    overflow: auto;
  }
}
</style>
2
3
4
5
6
7
8
9
10
11
12
13
14
15
16
17
18
19
20
21
22
23
24
25
26
27
28
29
30
31
32
33
34
35
36
37
38
39
40
41
42
43
44

scss全局变量
src/styles/variable.scss
//左侧菜单宽度
$base-menu-width :260px;
//左侧菜单背景颜色
$base-menu-background: #001529;

//顶部导航的高度
$base-tabbar-height:50px;
2
3
4
5
6
7
滚动条
src/styles/index.scss
//滚动条外观设置

::-webkit-scrollbar{
  width: 10px;
}

::-webkit-scrollbar-track{
  background: $base-menu-background;
}

::-webkit-scrollbar-thumb{
  width: 10px;
  background-color: yellowgreen;
  border-radius: 10px;
}
2
3
4
5
6
7
8
9
10
11
12
13
14
15